


Introduction to HTML
What's a template, you may ask?
A template is a file that we can re-use to present different information in a consistent format – for example, you could use a template to help you write a letter because although each letter might contain a different message and be addressed to a different person, they will share the same format.
A Django template's format is described in a language called HTML (that's the HTML we mentioned in the first chapter, How the Internet works).
What is HTML?
HTML is a code that is interpreted by your web browser – such as Chrome, Firefox or Safari – to display a web page for the user.
HTML stands for "HyperText Markup Language". HyperText means it's a type of text that supports hyperlinks between pages. Markup means we have taken a document and marked it up with code to tell something (in this case, a browser) how to interpret the page. HTML code is built with tags, each one starting with < and ending with >. These tags represent markup elements.
Your first template!
Creating a template means creating a template file. Everything is a file, right? You have probably noticed this already.
Templates are saved in blog/templates/blog directory. So first create a directory called templates inside your blog directory. Then create another directory called blog inside your templates directory:
blog
└───templates
    └───blog
(You might wonder why we need two directories both called blog – as you will discover later, this is a useful naming convention that makes life easier when things start to get more complicated.)
And now create a post_list.html file (just leave it blank for now) inside the blog/templates/blog directory.
See how your website looks now: http://127.0.0.1:8000/
If you still have an error
TemplateDoesNotExist, try to restart your server. Go to the command line, stop the server by pressing Ctrl+C (Control and C keys together) and start it again by running apython manage.py runservercommand.
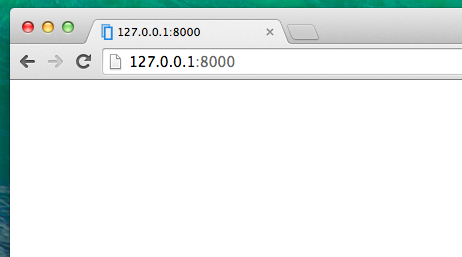
No error anymore! Congratulations! :) However, your website isn't actually publishing anything except an empty page, because your template is empty too. We need to fix that.
Open the new file in the code editor, and add the following:
blog/templates/blog/post_list.html
<!DOCTYPE html>
<html>
<body>
    <p>Hi there!</p>
    <p>It works!</p>
</body>
</html>
So how does your website look now? Visit it to find out: http://127.0.0.1:8000/
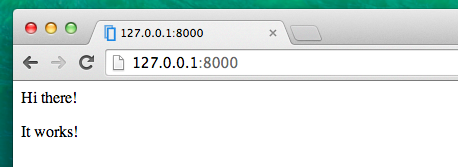
It worked. Nice work there! :)
- The line
<!DOCTYPE html>is not a HTML tag. It only declares the document type. Here, it informs the browser that document type is HTML5. This is always the beginning of any HTML5 file. - The most basic tag,
<html>, is always the beginning of html content and</html>is always the end. As you can see, the whole content of the website goes between the beginning tag<html>and closing tag</html> <p>is a tag for paragraph elements;</p>closes each paragraph
Head and body
Each HTML page is also divided into two elements: head and body.
head is an element that contains information about the document that is not displayed on the screen.
body is an element that contains everything else that is displayed as part of the web page.
We use <head> to tell the browser about the configuration of the page, and <body> to tell it what's actually on the page.
For example, you can put a web page title element inside the <head>, like this:
blog/templates/blog/post_list.html
<!DOCTYPE html>
<html>
    <head>
        <title>Ola's blog</title>
    </head>
    <body>
        <p>Hi there!</p>
        <p>It works!</p>
    </body>
</html>
Save the file and refresh your page.
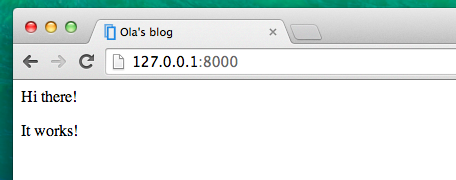
Notice how the browser has understood that "Ola's blog" is the title of your page? It has interpreted <title>Ola's blog</title> and placed the text in the title bar of your browser (it will also be used for bookmarks and so on).
Probably you have also noticed that each opening tag is matched by a closing tag, with a /, and that elements are nested (i.e. you can't close a particular tag until all the ones that were inside it have been closed too).
It's like putting things into boxes. You have one big box, <html></html>; inside it there is <body></body>, and that contains still smaller boxes: <p></p>.
You need to follow these rules of closing tags, and of nesting elements – if you don't, the browser may not be able to interpret them properly and your page will display incorrectly.
Customize your template
You can now have a little fun and try to customize your template! Here are a few useful tags for that:
<h1>A heading</h1>for your most important heading<h2>A sub-heading</h2>for a heading at the next level<h3>A sub-sub-heading</h3>…and so on, up to<h6><p>A paragraph of text</p><em>text</em>emphasizes your text<strong>text</strong>strongly emphasizes your text<br>goes to another line (you can't put anything inside br and there's no closing tag)<a href="https://djangogirls.org">link</a>creates a link<ul><li>first item</li><li>second item</li></ul>makes a list, just like this one!<div></div>defines a section of the page<nav></nav>defines a set of navigation links<article></article>specifies independent, self-contained content<section></section>defines a section in a document<header></header>specifies a header for a document or section<main></main>specifies the main content of a document<aside></aside>defines some content aside from the content it is placed in (like a sidebar)<footer></footer>defines a footer for a document or section<time></time>defines a specific time (or datetime)
Here's an example of a full template, copy and paste it into blog/templates/blog/post_list.html:
blog/templates/blog/post_list.html
<!DOCTYPE html>
<html>
    <head>
        <title>Django Girls blog</title>
    </head>
    <body>
        <header>
            <h1><a href="/">Django Girls Blog</a></h1>
        </header>

        <article>
            <time>published: 14.06.2014, 12:14</time>
            <h2><a href="">My first post</a></h2>
            <p>Aenean eu leo quam. Pellentesque ornare sem lacinia quam venenatis vestibulum. Donec id elit non mi porta gravida at eget metus. Fusce dapibus, tellus ac cursus commodo, tortor mauris condimentum nibh, ut fermentum massa justo sit amet risus.</p>
        </article>

        <article>
            <time>published: 14.06.2014, 12:14</time>
            <h2><a href="">My second post</a></h2>
            <p>Aenean eu leo quam. Pellentesque ornare sem lacinia quam venenatis vestibulum. Donec id elit non mi porta gravida at eget metus. Fusce dapibus, tellus ac cursus commodo, tortor mauris condimentum nibh, ut f.</p>
        </article>
    </body>
</html>
We've created one header section and two article section here.
- The
headerelement contains the title of our blog – it's a heading and a link - The two
articleelements contain our blog posts with a published date in atimeelement, ah2element with a post title that is clickable and ap(paragraph) element for text of our blog post.
It gives us this effect:

Yaaay! But so far, our template only ever displays exactly the same information – whereas earlier we were talking about templates as allowing us to display different information in the same format.
What we really want to do is display real posts added in our Django admin – and that's where we're going next.
One more thing: deploy!
It'd be good to see all this out and live on the Internet, right? Let's do another PythonAnywhere deploy:
Commit, and push your code up to GitHub
First off, let's see what files have changed since we last deployed (run these commands locally, not on PythonAnywhere):
command-line
$ git status
Make sure you're in the djangogirls directory and let's tell git to include all the changes in this directory:
command-line
$ git add .
Before we upload all the files, let's check what git will be uploading (all the files that git will upload should now appear in green):
command-line
$ git status
We're almost there, now it's time to tell it to save this change in its history. We're going to give it a "commit message" where we describe what we've changed. You can type anything you'd like at this stage, but it's helpful to type something descriptive so that you can remember what you've done in the future.
command-line
$ git commit -m "Changed the HTML for the site."
Make sure you use double quotes around the commit message.
Once we've done that, we upload (push) our changes up to GitHub:
command-line
$ git push
Pull your new code down to PythonAnywhere, and reload your web app
- Open up the PythonAnywhere consoles page and go to your Bash console (or start a new one). Then, run:
PythonAnywhere command-line
$ cd ~/<your-pythonanywhere-domain>.pythonanywhere.com
$ git pull
[...]
You'll need to substitute <your-pythonanywhere-domain> with your actual PythonAnywhere subdomain name, without the angle-brackets. Your subdomain name is normally your PythonAnywhere user name, but in some cases it might be a bit different (such as if your user name contains capital letters). So if this command doesn't work, use the ls (list files) command to find your actual subdomain/folder name, and then cd to there.
Now watch your code get downloaded. If you want to check that it's arrived, you can hop over to the "Files" page and view your code on PythonAnywhere (you can reach other PythonAnywhere pages from the menu button on the console page).
- Finally, hop on over to the "Web" page and hit Reload on your web app.
Your update should be live! Go ahead and refresh your website in the browser. Changes should be visible. :)